Steps for Remodeling a Bathroom
Give Your Bathroom a New Look
Tired of pink bathroom from the 80s, leaky fixtures, and dated tile? Does your current bathroom suffer from a case of the blahs and need some design inspiration? If your bathroom needs a new look whether it be a partial update or a complete overhaul, remodeling a bathroom is a great way to upgrade your home. Before you start dreaming about that spa shower, you should take the time to plan the renovation step by step to help keep you on budget and prepared so you know what you’re getting into when tackling your bathroom remodel. Before beginning any remodel project, check with your local government regarding any necessary permits you may need to obtain.
Since we already covered how to plan and budget for your project in our “Bathroom Remodel Guide”, we will now focus on the steps it takes to complete a remodel from start to finish.

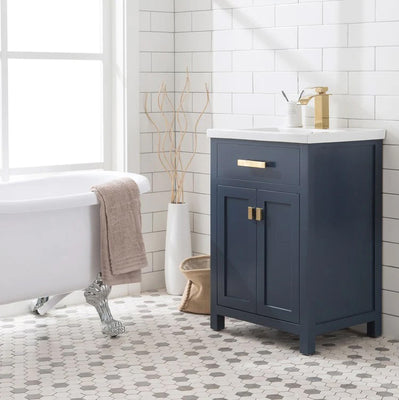
Take your bathroom from dated to beautiful with a full remodel.
Gather Your Tools and Supplies
If you are a skilled DIYer and doing most or part of the remodel yourself, make sure you have the all the tools and supplies you need before starting your bathroom project. Here’s a list of essentials you should have on hand. What you actually need will depend on what tasks you will be handling yourself, but this list will help you determine what tools are required.
- Pry Bar
- Safety Mask or Respirator
- Work Gloves
- Goggles
- Hammer
- Power Drill
- Power Saw
- Tape Measure
- Adjustable Wrench
- Flathead Screwdriver
- Chisel
- Hacksaw
- Utility Knife
- Caulking Gun
- Silicone Sealant
- Spackle or Putty Knife
- Spackle
- Stud Finder
- Chalk Line
- Extension Cord
- Wet/Dry Shop Vac
- Nail Gun (if installing molding or other woodwork)
- Level
- Carpenter's Square
- Notched Trowel or Spreader
- Rubber Grout Float
- Tile Spacers
- Tile Cutter and Nippers
- Bucket
- Sponge
- Drop Cloth(s)
- Paint Brush
- Paint Roller
Chances are you already have some or all of the above items in your toolbox. For items you need, you can either buy them or rent them at most home improvement stores. Don’t forget to include costs for purchasing or renting the tools into your total project budget.

Gather your tools and let the demo begin!
Let the Demo Begin
Before you can build your new dream bathroom, you will need to demo the existing room. This can entail simply removing a few fixtures or involve a complete tear-down of the room right to the studs. Here’s the step by step guide to take you through all tasks involved in a bathroom renovation. If you are doing a full demo, it’s a good idea to rent a dumpster for the demolition debris to make it easier to dispose of all at once.
Remove all bathroom fixtures
- Turn off and disconnect the water supply to your toilet, shower, and sink faucet.
- Drain and remove the toilet (keep a bucket and rugs nearby to wipe up water spills during the process). If you are reinstalling the same toilet, store it in a heavy-duty plastic bag to avoid drips from any remaining water.
- If you are removing the tub, cover up the tub with a drop cloth and remove the tile down to the studs. This is necessary in order to access piping to rework the plumbing to fit your new design.
- Remove insulation from the walls where necessary using a reciprocating saw to cut the panels. Always wear a safety mask, gloves, and googles to protect your hands, eyes, and lungs from dust and debris.
- Remove cabinets, vanities, mirrors, and other accessories.
- If you are also removing existing wall board, remove baseboard, door, and window trim using a pry bar and thin putty knife or specialty tool designed for wood trim removal. If you are reinstalling the trim, do this step carefully to prevent splintering or breaking the wood.
- Remove the tile flooring after the baseboards. Your hammer and chisel will come in handy during this step. Multi-tools are also useful in removing stubborn mortar residue that may remain.
- Remove any wall board if gutting the room to the studs,
- Replace or relocate any electrical wiring, lighting boxes, and outlets if needed.
Install your new shower and/or tub basin
If you are replacing your tub and shower, you will need to pick a shower pan and tub basin to fit your space and the new décor you have planned. You may be installing an alcove tub and shower combination or if your budget and space allows, be installing a separate shower stall and freestanding bathtub or separate built-in drop-in tub as part of your design.
- Replace any damaged subflooring if you see signs of rotting wood or water damage.
- Reroute any plumbing pipes and drains if needed.
- Install new plumbing rough-in valves if needed.
- Install new shower stall and tub basins.
Lay down new floor tiles
If installing the new tile yourself, you may want to purchase or rent a wet saw to cut the tile. You can also use a manual tile cutter, but if you need to make intricate cuts or if a lot of cutting is involved, a wet saw will make the job easier and quicker. Make sure you purchase extra tile above what is needed to cover the room’s square footage to account for any cutting mistakes, breakage, and to have replacements on hand for any future repairs.
If the subflooring needs replacing, install cement boards or flooring rated for wet/damp locations. Before you start spreading out the thin-set mortar, mark reference lines perpendicular (at a 90-degree angle) to the wall with the longest continuous line using a chalk line. This marked chalk line with help you place your first row of tiles in a straight line.
Install the floor tile
- Working on a section at a time, spread the mortar using a notched trowel or spreader.
- Back butter the tiles by spreader mortar on the back to improve adhesion.
- Lay down the tiles using spacers to align them equally.
- Continue until the floor is covered, cutting tiles as needed.
- Let the mortar set completely. Time will vary depending on the type of mortar used.
- Remove the tile spacers.
- Mix the grout according to directions (or you can use pre-mixed grout).
- Spread grout using the grouter float, working into the spaces between the tiles at a 45-degree angle across the joints to ensure the gaps are filled completely. Remove as much excess as possible from the flat surfaces of the tile.
- Let the grout dry 20-30 minutes or as recommended by the grout manufacturer.
- Using a damp sponge, wipe the tile and grout lines in a circular motion to remove the grout haze. Rinse and squeeze out excess water from the sponge often to ensure no residue remains on the tile.
- Avoid heavy traffic on the floor for 72 hours to allow the grout to dry.
- Allow the grout to fully cure for three weeks before sealing it.
Hang new drywall
Once you’ve installed the floor, you can hang any new drywall if needed. Tape and mud seams and screws to ensure a smooth surface. Sand down the walls once the spackle has dried and wipe them with a tack cloth to remove all traces of dust before painting. Prime and paint the walls.
Install the new vanity and cabinets
Install your new vanity or pedestal sink and any other cabinets. You will need to secure it to the wall and caulk the wall around the backsplash or countertop.
Install new fixtures
Add your new faucet fixture trims to the sink, tub, and shower. These will include the sink faucet, shower head and/or handshower, tub faucet, drain covers, and shower outlet trim.
Install your lighting fixtures including vanity lights, ceiling lights, and ventilation fans, along with any task or accent lighting such as undercabinet lighting or recessed lighting fixtures.
Finish hooking up plumbing
Install your new toilet or reinstall your existing one. You will need to follow these steps for installing a toilet:
- Replace the flange if it is cracked or damaged.
- Install a new wax ring around the flange.
- Place the toilet on the flange (you may need two people for this step).
- Bolt the toilet to the floor.
- Attach the tank (if you are installing a two-piece toilet ).
- Reattach the supply line and turn on the shutoff valve to allow the tank to fill.
- Flush the toilet and check for leaks.
- Add the seat and lid and cover the bolts with the bolt caps.
Add the accessories and finishing touches
Your new bathroom is almost done and ready to enjoy. Now that all the fixtures are in place, you can add all the finishing touches to your room’s décor.
- Reinstall or add new wood trim to your doors, windows, and baseboards.
- Install any wall shelves and add any storage racks, caddies, or organizers.
- Hang towel bars and toilet paper holders.
- Add accessories to your vanity such as a soap dish, tumbler, toothbrush holder, lotion dispenser, soap tray, robe hooks, a toilet brush, and a wastebasket, etc.
- Hang up any wall décor.
- Add bath linens such as towels, a shower curtain, and rugs.
- Stock up on your beauty care essentials.
Now that your dream bath is a reality, sit back and relax with a good soak or a refreshing shower. If you need design inspiration, check out Riverbend Home’s advice and idea section for helpful solutions to your bathroom needs.